dto.User
1
2
3
4
5
6
7
8
9
10
11
12
13
14
15
16
17
18
19
20
21
22
package com.example.response.dto;

@Setter
@Getter
@ToString
public class User {

    private String name;
    private int age;
    private String phoneNumber;
    private String address;

    @Override
    public String toString() {
        return "User{" +
                "name='" + name + '\'' +
                ", age=" + age +
                ", phoneNumber='" + phoneNumber + '\'' +
                ", address='" + address + '\'' +
                '}';
    }
}
ApiController
1
2
3
4
5
6
7
8
9
10
11
12
13
14
15
16
17
18
19
package com.example.response.controller;

import com.example.response.dto.User;
import org.springframework.web.bind.annotation.*;

@RestController
@RequestMapping("/api")
public class ApiController {

    @GetMapping("/text")
    public String text(@RequestParam String account){
        return account;
    }

    @PostMapping("/json")
    public User json(@RequestBody User user){
        return user;
    }
}

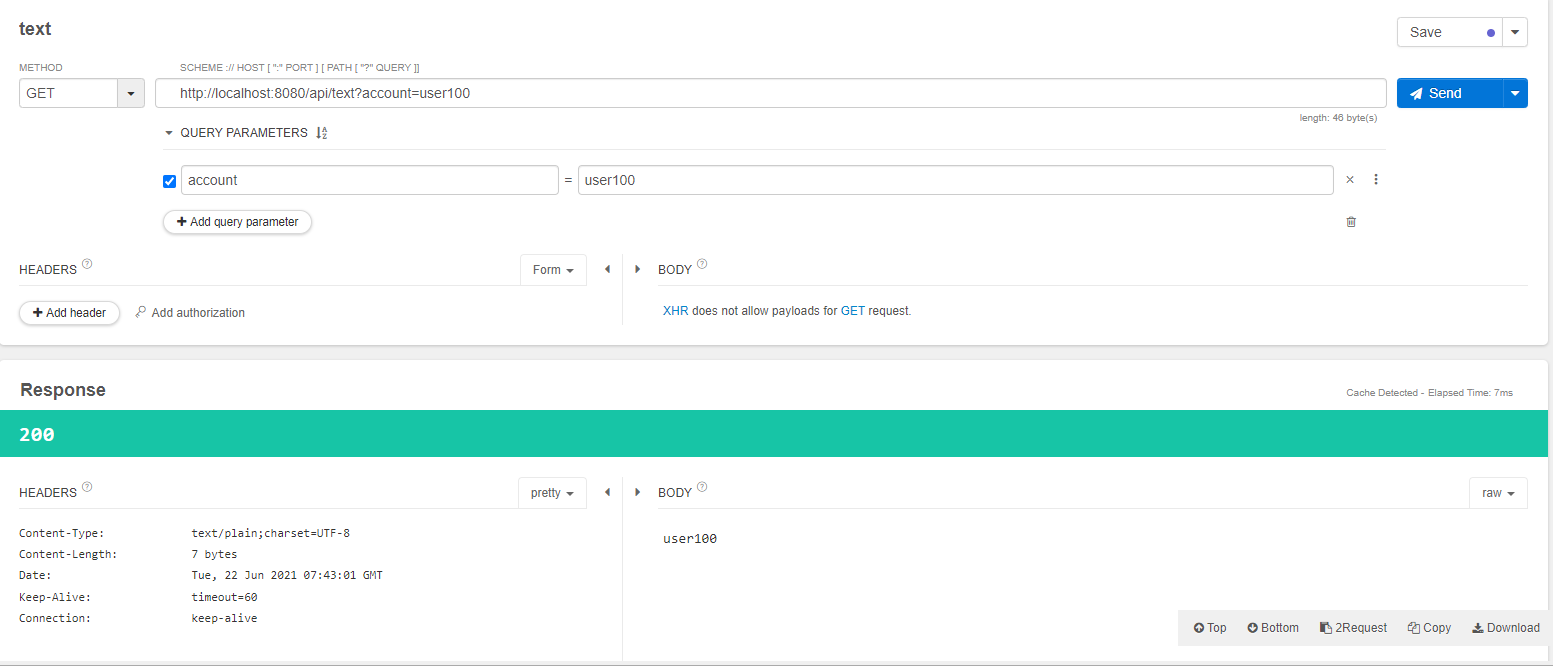
- Response의 type이 text/plain이고 charset=UTF-8인것을 확인할 수 있다.
- String을 그대로 Return하였기 때문에 위와 같은 Content-type이 된다.

- json요청의 경우 object를 return하였는데 Response의 Content-Type이 json인것을 확인할 수 있다. 이는 spring이 object mapper를 통해 mapping시켜주기 때문이다.
- 실제 request가 들어오면 object mapper가 request를 object로 mapping시켜주고 method가 실행된 뒤 return 된 object는 다시 object mapper를 거쳐 json으로 변환되고 이를 response한다.
- request → object mapper → object → method → object → object mapper → response
- 위에 작성한 예시는 POST요청 Body의 JSON을 모두 camelCase로 전송하였는데 보통 JSON으로는 snake_case를 사용한다. 아래와 같이 JsonNaming으로 property를 설정해 snake_case를 사용할 수 있다.
JsonNaming
1
2
3
4
5
6
7
8
9
10
11
12
13
14
15
16
17
package com.example.response.dto;

import com.fasterxml.jackson.databind.PropertyNamingStrategy;
import com.fasterxml.jackson.databind.annotation.JsonNaming;

@Setter
@Getter
@ToString
@JsonNaming(value = PropertyNamingStrategy.SnakeCaseStrategy.class)
public class User {

    private String name;
    private int age;
    private String phoneNumber;
    private String address;

}

응답 Status, Body, Header Custom
1
2
3
4
5
6
7
8
9
10
11
12
13
14
15
16
17
18
19
20
21
22
23
24
25
26
package com.example.response.controller;

import com.example.response.dto.User;
import org.springframework.http.HttpStatus;
import org.springframework.http.ResponseEntity;
import org.springframework.web.bind.annotation.*;

@RestController
@RequestMapping("/api")
public class ApiController {

    @GetMapping("/text")
    public String text(@RequestParam String account){
        return account;
    }

    @PostMapping("/json")
    public User json(@RequestBody User user){
        return user;
    }

    @PutMapping("/put")
    public ResponseEntity<User> put(@RequestBody User user){
        return ResponseEntity.status(HttpStatus.CREATED).body(user);
    }
}
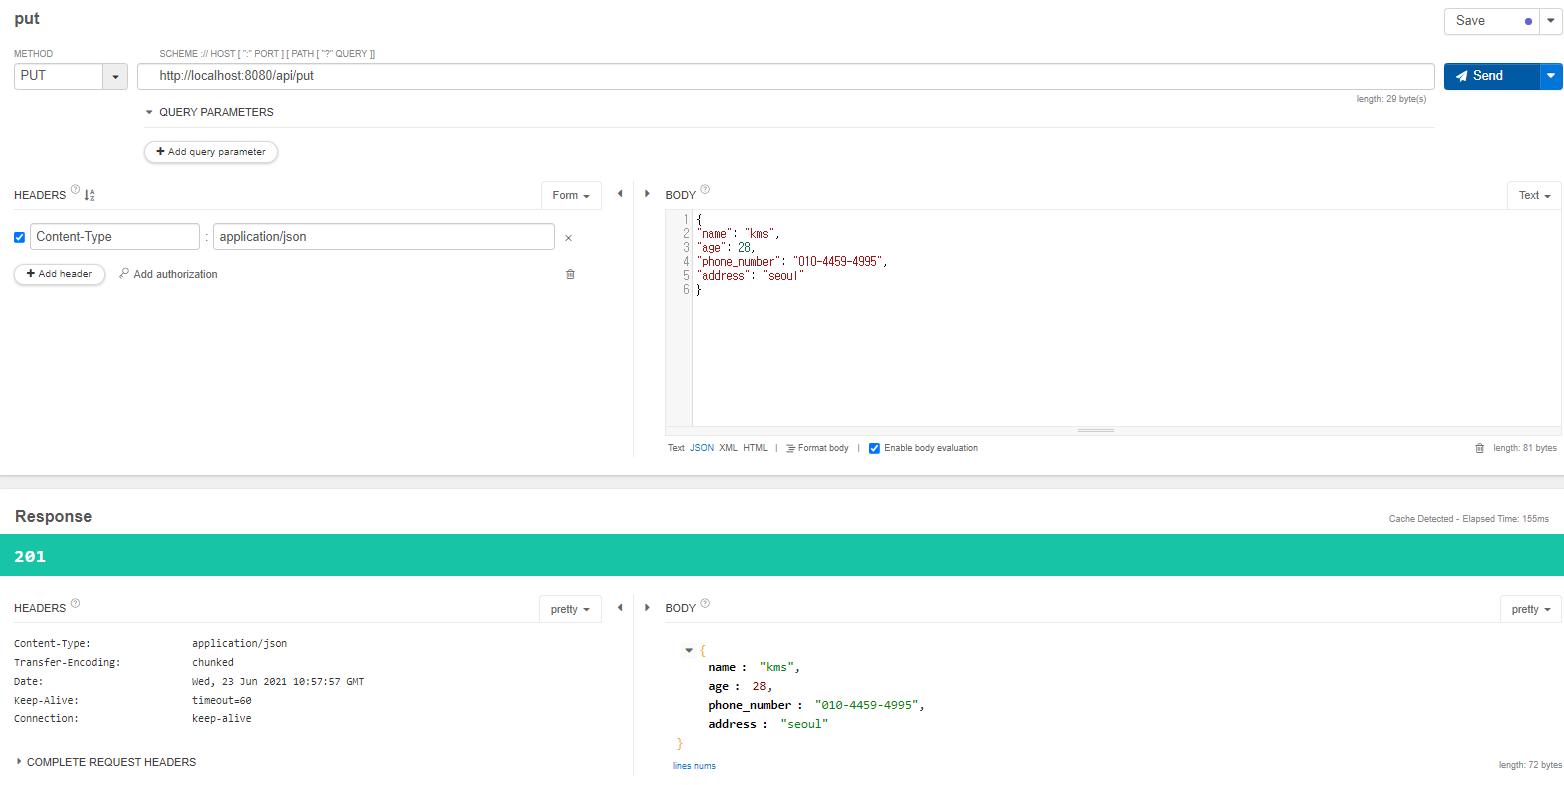
- ResponseEntity를 사용해 Status code, body, Header를 원하는대로 전달할 수 있다.
- PUT 요청에 대해서 201 status code와 body로 user정보를 JSON으로 반환해준다.

HTML Page Response
- 서버를 작성하다 보면 단순히 API를 작성하는 서버를 만들 수 도 있지만, Page를 return하는 서버를 만들어야 할 때도 있다.
- REST Controller가 아닌 Controller annotation을 사용해 Page를 return할 수 있는데 이럴 경우 return이 String이라면 자동으로 resources하위에 있는 html파일을 찾아 return해준다.
1
2
3
4
5
6
7
8
9
10
11
12
13
package com.example.response.controller;

import org.springframework.stereotype.Controller;
import org.springframework.web.bind.annotation.RequestMapping;

@Controller
public class PageController {

    @RequestMapping("/main")
    public String main(){
        return "main.html";
    }
}
- resources/static 하위에 main.html을 만들면 위의 PageController가 main URI 접속에 대해서 main.html파일을 리턴한다.
- RESTController가 아니라, Controller에서도 JSON을 리턴할 수 있다.
1
2
3
4
5
6
7
8
9
10
11
12
13
14
15
16
17
18
19
20
21
22
23
24
25
package com.example.response.controller;

import com.example.response.dto.User;
import org.springframework.stereotype.Controller;
import org.springframework.web.bind.annotation.GetMapping;
import org.springframework.web.bind.annotation.RequestMapping;
import org.springframework.web.bind.annotation.ResponseBody;

@Controller
public class PageController {

    @RequestMapping("/main")
    public String main(){
        return "main.html";
    }

    @ResponseBody
    @GetMapping("/user")
    public User user(){
        User user = new User();
        user.setName("kms");
        user.setAddress("seoul");
        return user;
    }
}

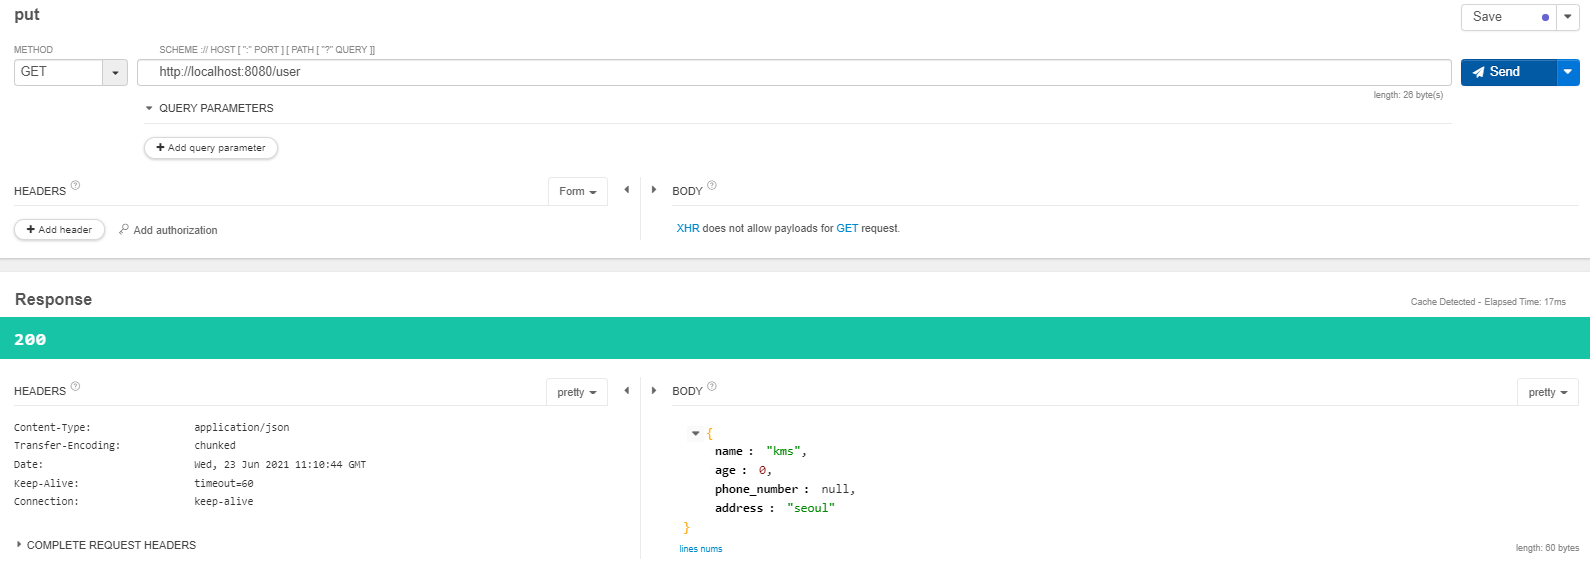
- ResponseBody annotation을 사용해 JSON을 리턴할 수 있고, 위의 BODY를 살펴보면 age 와 phone_number의 경우 set을 하지 않아 0, null이 들어간 것을 볼 수 있다.
- age의 경우 현재 User Class에 int형 즉 primitive type으로 선언 되어 있기 때문에 0이 defalut인데 Integer로 Type을 변경하면 default를 null로 설정할 수 있다.
- object mapper는 getMethod를 사용해 변수를 가져오기 때문에 getter도 반드시 작성해야한다.
- 그리고 User Class에 JsonInclude(JsonInclude.Include.NON_NULL) Annotation을 추가해 null인 값은 제외하고 JSON으로 변경할 수 있다. 이러한 스펙은 JSON규격을 정할 때 규격서에 명시를 해야한다. 보통은 Default로 사용한다.